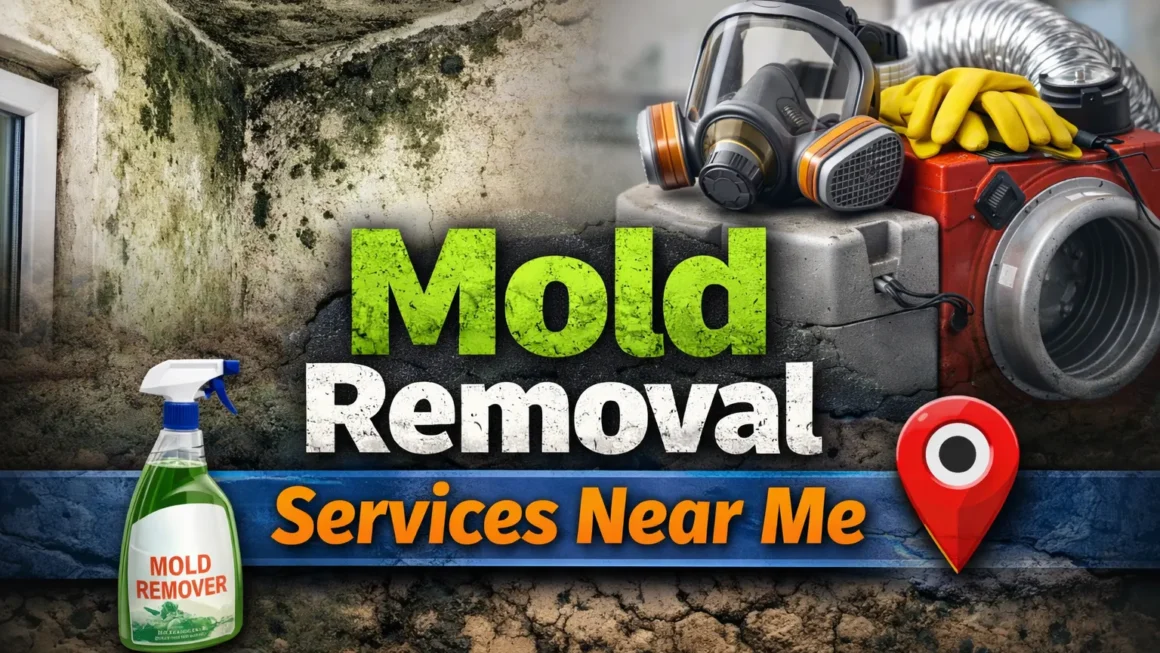
Homeownership is often described as the American Dream, a milestone representing stability, independence, and financial achievement. But there’s another side to this dream that real estate agents don’t emphasize during those glossy open houses: things break. Constantly. Inevitably. And often expensively.
If you’re a new homeowner, you might be shocked by how quickly repair costs accumulate. If you’re a seasoned homeowner, you’ve likely developed a familiar dread when you hear an unfamiliar sound, notice something not working quite right, or see water where it shouldn’t be. That sinking feeling in your stomach comes from experience—from knowing that what starts as a minor issue can quickly escalate into a four-figure repair bill.
The financial impact of home repairs is substantial. According to various homeownership studies, the average homeowner spends between $3,000 and $6,000 annually on maintenance and repairs, with older homes often requiring significantly more. These aren’t planned expenses like mortgage payments or property taxes—they’re surprise attacks on your budget, often arriving at the worst possible times.
Understanding what components of your home are most likely to fail, why they fail, and what it actually costs to fix them is essential for financial planning and peace of mind. This comprehensive guide examines the most common home repairs, provides realistic cost expectations, and offers insights into preventing these failures or minimizing their impact on your wallet.
HVAC Systems: The Silent Budget Destroyer
Your heating, ventilation, and air conditioning system is one of your home’s most expensive and most frequently failing components. HVAC issues top the list of costly home repairs, and most homeowners will face multiple HVAC-related expenses throughout their time in a home.
Why HVAC Systems Fail So Frequently
HVAC systems are complex mechanical equipment that operate in challenging conditions. Furnaces endure extreme temperature cycling, from ambient temperature to 140 degrees or higher, thousands of times per year. Air conditioners move refrigerant at high pressure while dealing with outdoor temperatures that can exceed 100 degrees. The constant expansion, contraction, and mechanical stress take their toll.
Component failure is common because HVAC systems contain dozens of parts that must work in precise coordination. Heat exchangers crack from thermal stress. Compressors burn out from overwork or refrigerant issues. Blower motors fail from bearing wear. Capacitors degrade over time and lose their ability to start motors. Control boards succumb to power surges or age-related failure.
Many HVAC problems result from neglect. Air filters that should be changed monthly go six months or more without replacement. The resulting restricted airflow forces systems to work harder, stressing components and reducing efficiency. Outdoor units become clogged with debris, grass clippings, and cottonwood seeds, restricting heat exchange and forcing compressors to run at higher pressures than designed.
The average lifespan of HVAC equipment is 15 to 20 years for furnaces and 10 to 15 years for air conditioners, but many systems fail earlier due to poor maintenance, manufacturing defects, or simply being undersized for the home they’re trying to heat and cool.
The Real Costs of HVAC Repairs
HVAC repair costs vary dramatically depending on what fails. A simple capacitor replacement might cost $150 to $400—annoying but manageable. But when major components fail, costs escalate quickly.
Compressor replacement for central air conditioning typically runs $1,500 to $3,000, and because compressors often fail in older units with other age-related issues, many homeowners opt for complete system replacement rather than investing heavily in aging equipment. Heat exchanger cracks in furnaces cost $1,200 to $2,500 to replace, though this repair often signals it’s time for a new furnace, given the labor involved.
Refrigerant leaks present particularly expensive problems. First, you pay to locate the leak—$200 to $600, depending on accessibility. Then you pay for the repair—$300 to $1,500, depending on location and extent. Finally, you pay to recharge the system with refrigerant—$400 to $2,000, depending on the type and amount needed. Older systems using R-22 refrigerant face astronomical recharge costs as this phased-out refrigerant becomes increasingly scarce and expensive.
Blower motor replacement costs $450 to $800. Control board replacement runs $350 to $600. Evaporator coil replacement ranges from $800 to $2,500. Even “minor” repairs like cleaning coils, replacing thermostats, or fixing ductwork typically cost $200 to $500.
When complete replacement becomes necessary, costs are substantial. A new furnace installation runs $2,500 to $6,000 for mid-range efficiency models, with high-efficiency units reaching $8,000 or more. Air conditioner replacement costs $3,500 to $7,000 for typical residential installations. If you need both simultaneously, you’re looking at $6,000 to $12,000 or more—a devastating expense for most households.
Prevention and Practical Advice
Regular maintenance significantly extends HVAC lifespan and prevents many failures. Change air filters monthly—this simple $5 task prevents countless expensive repairs. Schedule annual professional maintenance before heating and cooling seasons begin. A $100 to $200 maintenance visit often prevents $1,000+ emergency repairs.
Keep outdoor units clear of debris, vegetation, and obstructions. Ensure at least two feet of clearance on all sides for proper airflow. Clean or replace filters in mini-split indoor units monthly.
When facing expensive repairs on aging equipment, calculate the cost-benefit of repair versus replacement. The “50 percent rule” provides guidance: if repair costs exceed 50 percent of replacement cost and the equipment is past its expected lifespan, replacement is usually the better investment.
Consider home warranties or maintaining an emergency fund specifically for HVAC replacement. These systems will fail eventually, and being financially prepared when that day comes prevents the panic of scrambling for thousands of dollars on short notice.
Water Heaters: The Ticking Time Bombs
Few home components fail as dramatically or with such devastating consequences as water heaters. These appliances sit quietly in basements, garages, or closets, faithfully providing hot water for years until suddenly they don’t—and when they fail, they often do so catastrophically.
Understanding Water Heater Failures
Water heaters fail through slow degradation that eventually reaches a tipping point. The anode rod, a sacrificial component designed to attract corrosive elements and protect the tank, slowly dissolves over 5 to 8 years. Once depleted, corrosion attacks the tank itself, gradually thinning the steel until it can no longer contain pressure.
Sediment accumulates at the tank bottom as minerals in water precipitate during heating. This sediment layer insulates the tank from the heat source, forcing the heater to work longer and harder to heat water. More critically, it traps water against the tank bottom, accelerating corrosion in that area where the tank is most vulnerable.
Pressure relief valves can fail, removing the critical safety mechanism that prevents excessive pressure buildup. While rare, this creates a risk of catastrophic tank rupture. More commonly, these valves develop minor leaks that worsen over time.
Temperature and pressure fluctuations cause metal fatigue through constant expansion and contraction. Connection points between the tank and supply lines develop leaks as seals degrade. In areas with hard water, lime and mineral buildup restricts flow and damages heating elements in electric models.
The average water heater lasts 8 to 12 years, with some failing earlier and others lasting 15+ years, depending on water quality, usage patterns, and maintenance. Most homeowners replace their water heater at least twice during ownership of a single home.
What Water Heater Repairs Actually Cost
Minor water heater repairs are relatively affordable. Replacing a pressure relief valve costs $100 to $300. Replacing a faulty thermostat runs $150 to $250. Fixing minor leaks at connection points might cost $75 to $200.
Heating element replacement in electric water heaters costs $200 to $400 per element. Gas valve replacement ranges from $300 to $500. If the pilot light won’t stay lit or the burner won’t fire, diagnosis and repair typically run $150 to $350.
However, tank failure requires complete replacement—repairs aren’t possible once the tank develops leaks. Water heater replacement costs vary by type, size, and installation complexity.
Standard 40 to 50-gallon tank water heaters cost $800 to $1,800 installed for basic models. Mid-range models with better warranties and efficiency run $1,200 to $2,500 installed. If you’re upgrading tank size, changing fuel types (electric to gas or vice versa), or relocating the unit, costs increase to $2,000 to $4,000 or more.
Tankless water heater installation costs significantly more—$2,500 to $5,000 or higher, depending on whether you’re replacing an existing tankless unit or converting from a tank system. The higher upfront cost is offset by longer lifespan (20+ years) and energy savings, but the initial expense is substantial.
Emergency replacement services command premium pricing. If your water heater fails on a weekend or holiday and you need immediate replacement, expect to pay 50 to 100 percent more than standard installation costs.
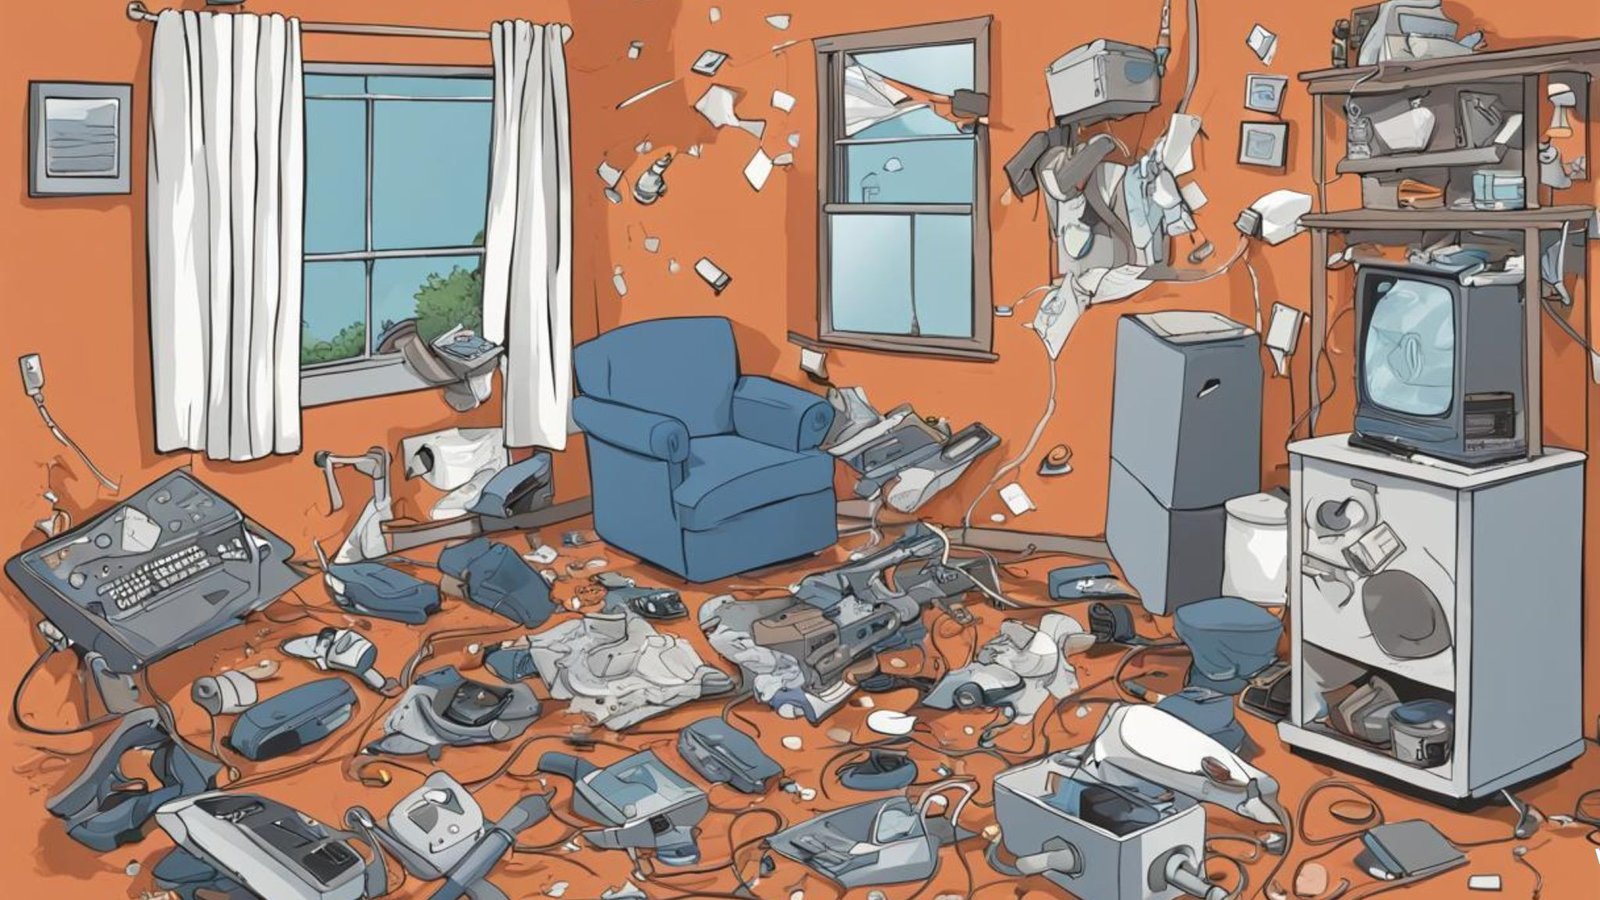
Water damage from failed water heaters adds thousands to tens of thousands to costs. A 50-gallon tank releasing all its water into your finished basement can cause $5,000 to $30,000 in water damage, mold remediation, and restoration costs.
Protecting Yourself and Your Budget
Proactive replacement prevents disasters. If your water heater is 8+ years old, start budgeting for replacement even if it’s still working. The manufacturing date is encoded in the serial number—search online for your brand’s decoding method to determine your unit’s age.
Annual maintenance extends lifespan. Drain several gallons from the tank annually to remove sediment. Test the pressure relief valve. Inspect the anode rod every 3 to 5 years and replace it if heavily corroded—this $150 service can extend tank life by years.
Install a drain pan under the water heater with a drain line leading to a safe discharge point or floor drain. This $50 to $150 installation catches leaks and directs water away from living spaces, preventing catastrophic damage if the tank fails.
Water heater alarms provide early warning. These $10 to $30 devices sit in the drain pan and sound an alarm when they detect moisture, alerting you to small leaks before they become floods.
Consider tankless or hybrid heat pump water heaters when replacement time comes. While more expensive upfront, their longer lifespans and greater efficiency often make them more economical over their lifetime.
Roofing: The Expense Hanging Over Your Head
Your roof is literally your home’s first line of defense against the weather, and roof problems are among the most expensive repairs homeowners face. Roof replacement represents one of the single largest maintenance expenses you’ll encounter during homeownership.
Why Roofs Fail
Roofs deteriorate gradually from continuous exposure to sun, wind, rain, snow, and temperature extremes. UV radiation breaks down asphalt shingles’ petroleum-based materials, making them brittle. Wind lifts and tears shingles, creating openings for water infiltration. Freeze-thaw cycles cause expansion and contraction that loosen fasteners and crack materials.
Asphalt shingles, the most common roofing material, typically last 15 to 30 years, depending on quality and climate. In hot, sunny climates, roofs deteriorate faster. In areas with severe weather, hail damage and high winds cause premature failure.
Flashing around chimneys, skylights, and roof penetrations fails as sealants dry out and metal corrodes. Valleys where roof planes meet concentrate water flow and wear faster than the surrounding areas. Ridge caps at roof peaks are most exposed to weather and often show damage first.
Poor installation accelerates failure. Inadequate attic ventilation traps heat and moisture, cooking shingles from below, and drastically reduces their lifespan. Improper flashing installation creates immediate leak pathways. Using too few or wrong fasteners allows shingles to blow off in moderate winds.
Ice dams in cold climates cause severe damage when melting snow refreezes at roof edges, forcing water under shingles and into homes. Moss and algae growth, while primarily cosmetic, can lift and damage shingles over time.
The Reality of Roofing Costs
Roof repair costs depend on the extent and type of damage. Small repairs like replacing a few damaged shingles or resealing flashing run $200 to $500. More extensive repairs addressing larger damaged sections cost $500 to $1,500. Valley repairs or complex flashing work can reach $1,000 to $2,500.
However, many roof issues require complete replacement rather than repair, especially if the roof is older or damage is widespread. Partial reroofing, covering just one section or slope, costs $2,000 to $6,000, depending on size and complexity.
Complete roof replacement is where costs become truly significant. For a typical 1,500 to 2,000 square foot home with standard asphalt shingles, expect to pay $5,000 to $12,000. This includes tearing off old shingles, replacing damaged decking, installing new underlayment, and installing new shingles.
Premium architectural shingles with longer warranties increase costs to $8,000 to $16,000. If extensive decking replacement is needed due to water damage or rot, add $1,500 to $5,000 or more to your bill.
Complex roof designs with multiple valleys, dormers, skylights, and steep pitches cost significantly more—often $12,000 to $25,000 or higher for larger homes. Additional expenses include chimney flashing replacement ($500 to $1,500), skylight replacement ($800 to $2,500 each), and gutter replacement if needed ($1,000 to $3,000).
Alternative roofing materials cost substantially more. Metal roofing runs $10,000 to $25,000 for typical installations but lasts 40 to 70 years. Clay or concrete tiles cost $15,000 to $30,000 or more. Slate roofing, while lasting 75 to 150 years, costs $25,000 to $60,000 or more.
Emergency roof repairs after storms command premium pricing. Tarping services to prevent further damage during storms cost $300 to $1,500. Emergency repairs during bad weather can cost 2 to 3 times the normal rates.
Managing Roof Expenses
Annual roof inspections identify problems before they become expensive. Walk your roof annually if safely accessible, or use binoculars from the ground to check for missing, curling, or damaged shingles. Look for granule loss, exposed nail heads, and damaged flashing.
After severe storms, inspect for damage immediately. Many insurance policies cover storm damage, but claims must be filed promptly. Document damage with photos before making repairs.
Maintain good attic ventilation to extend shingle life. Ensure soffit vents are clear and ridge vents are functioning. Adequate ventilation can add years to your roof’s lifespan by reducing heat and moisture buildup.
Keep gutters clean so water drains properly rather than backing up under shingles. Trim overhanging tree branches that can damage shingles or retain moisture on the roof surface.
Budget for roof replacement proactively. If your roof is 15+ years old, start setting aside money monthly. Saving $200 to $400 monthly for 2 to 3 years makes a $8,000 to $12,000 roof replacement manageable rather than catastrophic.
Get multiple quotes from reputable roofers. Prices can vary by $3,000 to $6,000 or more for the same job. Check references, verify licensing and insurance, and don’t necessarily choose the lowest bid if it seems too good to be true.
Plumbing: The Constant Drip on Your Finances
Plumbing problems are perhaps the most frequent home repairs homeowners face. From dripping faucets to sewer line replacements, plumbing issues range from minor annoyances to major catastrophes, with costs spanning an equally wide range.
Common Plumbing Failures
Faucets and fixtures develop leaks as washers, O-rings, and seals deteriorate from constant use and water exposure. A faucet used 10 times daily operates over 3,500 times yearly, and after several years, internal components simply wear out.
Drain clogs are inevitable as hair, soap scum, grease, and debris accumulate in pipes. Kitchen drains clog from grease and food particles. Bathroom drains clog from hair and soap buildup. Toilet clogs result from excessive paper or inappropriate items being flushed.
Supply line failures cause significant water damage. Flexible supply lines to toilets, sinks, and appliances deteriorate over 5 to 10 years, developing bulges, cracks, or sudden bursts that release water at high pressure. Braided stainless steel lines are more durable but still fail eventually.
Water pressure problems result from corroded pipes, faulty pressure regulators, or partially closed main valves. Low pressure makes daily activities frustrating, while high pressure stresses pipes and fixtures, causing premature failure.
Sewer line issues represent the nightmare scenario for homeowners. Tree roots infiltrate sewer lines through small cracks, growing into massive blockages. Old clay or cast iron pipes crack, collapse, or become misaligned from ground shifting. These problems cause sewage backups into homes, expensive and disgusting to remediate.
Plumbing Repair Price Reality
Minor plumbing repairs are relatively affordable. Fixing a dripping faucet costs $100 to $250. Unclogging a simple drain runs $100 to $300. Replacing a flapper in a running toilet costs $150 to $25,0, including service call.
Moderate repairs get more expensive quickly. Replacing a faucet or fixture costs $200 to $500. Installing a new toilet runs $250 to $600. Repairing or replacing supply lines costs $150 to $400 per line.
Major plumbing issues carry substantial costs. Replacing a section of water supply pipe inside walls costs $500 to $2,000, depending on accessibility and length. Repiping an entire home with copper or PEX costs $4,000 to $15,000 or more, depending on home size and complexity.
Sewer line repairs and replacements are among the most expensive home repairs. Camera inspection to diagnose sewer line problems costs $200 to $500. Hydro-jetting to clear roots or buildup runs $300 to $800. Spot repairs to small sections cost $1,500 to $4,000.
Complete sewer line replacement costs $3,000 to $10,000 for traditional excavation methods, or $5,000 to $20,000+ for trenchless methods that install new pipe inside the old one without extensive digging. While more expensive initially, trenchless replacement avoids destroying landscaping, driveways, and hardscaping.
Emergency plumbing service adds 50 to 150 percent to costs. A $200 daytime repair becomes $400 to $500 at night or on weekends. But when water is flooding your home, you have no choice but to pay emergency rates.
Water damage from plumbing failures often exceeds the repair cost itself. A burst supply line releasing hundreds of gallons before discovery can cause $5,000 to $20,000 in water damage, flooring replacement, and mold remediation.
Plumbing Maintenance and Prevention
Regular maintenance prevents many plumbing problems. Replace supply lines proactively every 5 to 10 years before they fail—the $50 to $150 cost is nothing compared to flood damage. Upgrade to braided stainless steel lines for greater durability.
Address slow drains immediately before they become complete clogs. Use drain screens to catch hair and debris. Never pour grease down kitchen drains—dispose of it in the trash instead.
Have your foundation inspected by a structural engineer if you notice warning signs. A $500 to $800 inspection can identify problems early when repairs cost thousands instead of tens of thousands.
Building Your Home Repair Financial Strategy
Understanding what breaks most often and what it costs to fix helps you develop a realistic financial strategy for homeownership. Here’s how to prepare yourself for these inevitable expenses.
Create a Dedicated Home Maintenance Fund
Financial experts recommend setting aside 1 to 3 percent of your home’s value annually for maintenance and repairs. For a $300,000 home, that’s $3,000 to $9,000 per year. This might seem excessive, but consider that a single HVAC replacement and roof repair in the same year can easily exceed $15,000.
Start small if you can’t save the full recommended amount immediately. Even $200 monthly adds up to $2,400 annually—enough to cover many repairs without financial stress. Automate transfers to this fund so the money is set aside before you’re tempted to spend it elsewhere.
Keep this fund separate from your general emergency fund. Your emergency fund covers job loss, medical expenses, and other life emergencies. Your home maintenance fund covers the predictable reality that things in your home will break.
Prioritize Preventive Maintenance
Every dollar spent on preventive maintenance saves five to ten dollars on repairs. This isn’t just a catchy saying—it’s a mathematical reality. That $150 annual HVAC service prevents $1,500 emergency repairs. That $100 gutter cleaning prevents $5,000 foundation damage. That $20 in faucet washers prevents $500 in leak repairs.
Create a maintenance schedule covering:
- Monthly: Change HVAC filters, test GFI outlets, check for plumbing leaks
- Quarterly: Clean gutters, inspect roof, check appliance hoses
- Biannually: Service HVAC systems, drain water heater, and inspect the foundation
- Annually: Chimney inspection, septic pumping if applicable, professional roof inspection
This might seem like a lot of work, but it’s far less work than dealing with emergency repairs, water damage, or system failures.
Learn What You Can DIY and When to Call Professionals
Labor often represents 50 to 70 percent of repair costs, so doing repairs yourself saves substantially when appropriate. Learn basic skills: changing faucet washers, replacing outlet covers and switches, patching drywall, cleaning gutters, and basic appliance maintenance.
But know your limits. Electrical work beyond basic outlet/switch replacement, gas appliance repairs, major plumbing, HVAC repairs, and anything structural requires professionals. The money saved by DIY isn’t worth the risk of fire, flood, injury, or death. Additionally, improper repairs often cost more to fix properly than correct repairs would have cost initially.
Get Multiple Quotes for Major Work
For repairs exceeding $1,000, always get at least three quotes from licensed, insured contractors. Prices can vary by 30 to 50 percent or more for identical work. One contractor might quote $6,000 for a job while another charges $9,000—that’s $3,000 saved with a few hours of effort getting quotes.
But don’t automatically choose the lowest bid. Extremely low quotes might indicate:
- Unlicensed or uninsured contractors
- Poor quality materials
- Inexperienced workers
- Contractors who will cut corners or abandon the job
Check references, verify licensing and insurance, read online reviews, and trust your instincts. A mid-range quote from a reputable contractor is often the best choice.
Understand Your Home Warranty Options
Home warranties can help manage repair costs, but they’re not the solution for everyone. These service contracts typically cost $400 to $800 annually, plus service call fees of $75 to $150 per visit. They cover repairs to major systems and appliances, with limits on coverage amounts.
Benefits include:
- Predictable costs for covered repairs
- Access to pre-vetted contractors
- Protection against expensive surprises
- Convenient single point of contact for multiple issues
Drawbacks include:
- Not all repairs are covered
- Coverage limits might not cover full replacement costs
- Service quality varies significantly
- You might wait longer for service than calling your own contractor
Home warranties work best for people who want predictable costs and don’t mind some limitations. They’re less valuable if you have an emergency fund and prefer choosing your own contractors.
Know What Insurance Covers (and Doesn’t)
Homeowner’s insurance covers sudden, unexpected damage from covered perils like fire, wind, hail, and certain water damage. It doesn’t cover maintenance issues, normal wear and tear, or gradual damage.
Your insurance will likely cover:
- Roof damage from storms or falling trees
- Plumbing leaks that happen suddenly
- Electrical damage from lightning or power surges
- HVAC damage from covered perils
Your insurance won’t cover:
- Roof replacement due to age
- Gradual plumbing leaks or corrosion
- Appliance failures from normal wear
- Foundation issues from soil settlement
- Any damage resulting from a lack of maintenance
Understanding this distinction prevents frustrating claim denials. It also clarifies that you need personal funds for most repairs discussed in this article, as they result from normal wear rather than covered perils.
Plan for Major Replacements Proactively
You can predict when major systems will need replacement based on average lifespans:
- HVAC systems: 10-20 years
- Water heaters: 8-12 years
- Roofs: 15-30 years, depending on material
- Appliances: 8-15 years, depending on type
- Windows: 15-30 years
If your home has original 15-year-old components, start planning financially for their replacement. Saving $300 monthly for two years gives you $7,200—enough for many replacements. This proactive approach beats scrambling for thousands of dollars when systems fail unexpectedly.
Create a replacement timeline for major components in your home. Note the installation date and expected lifespan. When components reach 75 percent of expected lifespan, begin setting aside replacement funds.
Consider the True Cost of Ownership by Age
Newer homes (0-10 years) typically require $1,000 to $3,000 annually in maintenance and repairs. Many major systems are still under warranty, and components haven’t reached failure age.
Middle-aged homes (10-30 years) require $3,000 to $6,000 annually. Major systems begin needing replacement, and multiple components might need attention simultaneously.
Older homes (30+ years) often require $5,000 to $10,000+ annually. Multiple systems need replacement, and unforeseen issues become more common as everything ages together.
These are averages—your experience might differ significantly. But understanding these general patterns helps set realistic expectations and financial plans based on your home’s age.
The Psychology of Home Repairs: Why They Feel So Overwhelming
Beyond the financial impact, home repairs carry psychological weight that affects homeowners’ stress levels and decision-making. Understanding these psychological factors helps you manage them better.
The Surprise Factor
Unlike predictable expenses like mortgages and utilities, repairs hit suddenly and unexpectedly. Your HVAC works fine on Tuesday and dies on Wednesday. This surprise element triggers stress responses even when you have funds available. Building financial and psychological buffers—knowing repairs will happen and being financially prepared—reduces this stress significantly.
Decision Fatigue and Analysis Paralysis
Facing a major repair forces multiple decisions: Should I repair or replace? Which contractor should I choose? What quality level should I select? How much should I spend? This decision fatigue often leads to analysis paralysis, where homeowners delay action, sometimes making problems worse.
Combat this by educating yourself in advance about common repairs. When issues arise, you’ll already have a framework for decision-making rather than starting from scratch under pressure.
The Sunk Cost Fallacy
Many homeowners continue repairing aging equipment because they’ve already invested in previous repairs. “I just spent $800 on the furnace six months ago—I can’t replace it now” is a common thought process. But good financial decisions ignore sunk costs and focus on future value. If replacement makes more sense than another repair, previous repairs are irrelevant to current decisions.
Scope Creep and the Renovation Trap
Small repairs often uncover additional problems. You call a plumber to fix a leak, and they discover corroded pipes throughout the house. You hire a roofer for a small repair, and they find extensive decking damage. This scope creep causes initial quotes to balloon, creating frustration and financial stress.
Protect yourself by getting thorough inspections before repairs begin. An extra $100 to $200 for a comprehensive diagnosis prevents surprise cost escalations mid-project. Also, maintain your repair fund at higher levels than minimum estimates to cover unexpected discoveries.
The Guilt of Deferred Maintenance
Many homeowners feel guilty about deferred maintenance, knowing they should have acted sooner. This guilt doesn’t help and often prevents people from addressing problems when they finally acknowledge them. Let go of guilt about past decisions and focus on taking appropriate action now.
Conclusion: Embracing the Reality of Home Ownership
Homes are complex systems of interconnected components, all of which will eventually fail. This isn’t a flaw or a conspiracy—it’s simply reality. Everything degrades over time, and recognizing this as normal rather than catastrophic changes how you approach homeownership.
The homeowners who thrive financially and emotionally are those who accept that repairs are part of ownership, budget accordingly, maintain their homes proactively, and address problems promptly when they arise. They don’t view repairs as failures or punishments but as expected maintenance of valuable assets.
HVAC systems, water heaters, roofs, plumbing, appliances, electrical systems, and foundations all represent significant expenses during homeownership. But breaking down these costs into manageable expectations—saving monthly, maintaining regularly, repairing promptly—transforms overwhelming expenses into predictable financial planning.
Your home will break. Things will fail. Systems will need replacement. But with proper planning, adequate savings, preventive maintenance, and prompt attention to problems, these inevitable expenses become manageable challenges rather than catastrophic crises.
The key is shifting from reactive to proactive homeownership. Don’t wait for the furnace to die in January or the air conditioner to fail in July. Don’t ignore small leaks until they become floods. Don’t defer maintenance until minor issues become major expenses.
Instead, inspect regularly, maintain diligently, save consistently, and act promptly. Build relationships with reliable contractors before emergencies force you to hire whoever answers the phone. Research repair costs for your home’s systems so you’re not blindsided when they need attention.
Most importantly, remember that you’re not alone in facing these challenges. Every homeowner deals with repairs, replacements, and unexpected expenses. The difference between those who manage successfully and those who struggle isn’t luck—it’s preparation, knowledge, and realistic expectations about what homeownership truly costs.
Your home is probably your largest financial investment. Protecting that investment through proper maintenance and timely repairs ensures it provides security, comfort, and value for decades. Yes, things will break. But now you know what to expect, what it costs, and how to prepare. That knowledge transforms uncertain fear into confident financial planning, making homeownership more rewarding and less stressful.
The question isn’t whether your HVAC, water heater, roof, or appliances will fail—it’s when. And now you know what that “when” will cost and how to be ready for it. Your main sewer line is inspected every few years if you have mature trees near the line. Video camera inspection costs $200 to $400 but can reveal developing problems before they cause sewage backups.
Know where your main water shutoff valve is located and verify it works. In emergencies, shutting off water quickly minimizes damage. If your main valve is corroded or difficult to operate, have it replaced—this $200 to $500 expense prevents thousands in water damage.
Consider installing whole-house water leak detection systems. These monitor water flow and automatically shut off water when abnormal flow patterns indicate leaks. While expensive at $500 to $2,000 installed, they provide peace of mind and can prevent catastrophic water damage.
Appliances: The Modern Conveniences That Constantly Inconvenience
Today’s homes are filled with appliances that make life comfortable and convenient—until they stop working. Appliance repairs and replacements represent a significant ongoing expense for homeowners, with most households experiencing at least one major appliance failure every year or two.
Why Appliances Fail So Often
Modern appliances are more complex than their predecessors, with electronic controls, sensors, and specialized components that increase efficiency but also create more failure points. Where older washers had simple mechanical timers and switches, modern washers have circuit boards, touch panels, and sophisticated sensors that can fail.
Planned obsolescence plays a role, though manufacturers dispute this term. Many appliances are engineered to last 7 to 12 years, after which repair costs often exceed replacement costs, encouraging consumers to buy new units rather than repair old ones.
Usage patterns stress appliances beyond their design specifications. Dishwashers designed for once-daily use run multiple times daily in large families. Refrigerators in garages endure extreme temperatures they weren’t designed for. Dryers vent improperly, causing overheating and component failure.
Lack of maintenance accelerates failures. Refrigerator coils caked with dust force compressors to work harder. Dryer lint buildup restricts airflow and causes heating elements to burn out. Dishwasher spray arms clogged with food particles reduce cleaning effectiveness and stress pumps.
Water quality affects water-using appliances significantly. Hard water causes scale buildup in dishwashers, washing machines, and water heaters, reducing efficiency and damaging components. Sediment damages washing machine fill valves and dishwasher pumps.
Appliance Repair and Replacement Costs
Appliance repair costs vary dramatically depending on what fails. Simple repairs like replacing a dishwasher spray arm ($100 to $200) or washing machine door seal ($150 to $300) are manageable. But when major components fail, repair costs escalate quickly.
Refrigerator compressor replacement costs $400 to $800, plus refrigerant charges. Since compressors often fail in older units with other age-related issues, many people opt for replacement rather than expensive repairs. Refrigerator ice maker replacement runs $250 to $450. Control board replacement costs $300 to $600.
Washing machine transmission replacement costs $400 to $800. Replacing the main control board runs $300 to $500. Drum bearing replacement costs $250 to $450. With labor, these repairs often total $400 to $900, getting close to the cost of a new mid-range washer.
Dryer heating element replacement costs $200 to $350. Replacing the motor runs $300 to $500. Control board replacement costs $250 to $450. Thermal fuse replacement, a common failure, costs $150 to $250.
Dishwasher pump replacement costs $200 to $400. Control board replacement runs $250 to $450. Heating element replacement costs $200 to $350.
Oven heating element replacement costs $150 to $300. Control board replacement runs $300 to $600. If the entire control panel needs replacement, the costs reach $400 to $800.
When repair costs exceed 50 to 70 percent of replacement cost, or when appliances are 8+ years old, replacement usually makes more financial sense than repair. Replacement costs for major appliances range widely:
- Refrigerators: $800 to $3,000+, depending on size, features, and style
- Washing machines: $500 to $1,500 for standard models
- Dryers: $400 to $1,200 for standard electric or gas models
- Dishwashers: $400 to $1,200 for standard models
- Ranges and ovens: $600 to $2,500, depending on fuel type and features
- Microwave ovens: $150 to $500 for countertop, $200 to $1,000+ for over-range
High-end or specialty appliances cost substantially more, with premium refrigerators reaching $5,000 to $10,000+, professional ranges costing $3,000 to $8,000+, and luxury dishwashers running $1,200 to $2,500.
Managing Appliance Expenses
Extended warranties and protection plans have mixed value. Carefully read terms—many exclude common failures or charge deductibles that make coverage less valuable. For expensive appliances, coverage might be worthwhile. For budget appliances, you’re often better off self-insuring.
Regular maintenance extends appliance life. Clean refrigerator coils annually. Clean dryer lint from the housing, duct, and exterior vent every six months. Run dishwasher and washing machine cleaning cycles monthly. These simple tasks prevent many failures.
When appliances fail, get repair estimates before assuming replacement is needed. Sometimes simple repairs restore functionality at a reasonable cost. However, avoid the sunk cost fallacy of repeatedly repairing aging appliances—know when to let go.
Consider buying mid-range appliances rather than budget or luxury models. Budget appliances often use cheaper components that fail quickly. Luxury appliances have specialized parts that are expensive and hard to source. Mid-range models balance quality, repairability, and cost.
Buy appliances during sales events like Black Friday, Memorial Day, or Labor Day when discounts of 20 to 40 percent are common. This planning isn’t always possible when appliances fail unexpectedly, but if yours are aging, proactive replacement during sales saves hundreds.
Electrical Systems: The Shocking Costs of Wiring Issues
Electrical problems are both common and concerning, as they present fire hazards in addition to functionality issues. While homeowners can handle some minor fixes, most electrical work requires professional electricians, making these repairs relatively expensive.
Common Electrical Failures
Circuit breakers trip repeatedly when circuits are overloaded, when motors start up in HVAC systems or appliances, or when electrical faults develop. While occasional tripping is normal, frequent tripping indicates problems requiring attention.
Outlets and switches fail from wear, loose connections, or damage. Outlets stop gripping plugs firmly as the internal spring contacts weaken. Switches become stiff, fail to complete circuits, or spark when operated.
Electrical panels themselves degrade over time. Connections loosen, causing arcing and heat buildup. Breakers weaken and fail to trip when they should, creating fire hazards. Older panels with outdated breaker types become increasingly difficult to service as parts become unavailable.
Wiring insulation degrades, especially in older homes with cloth-wrapped or early plastic insulation. Rodents damage wiring by chewing through insulation. Water infiltration from leaks corrodes connections and damages insulation.
Aluminum wiring, common in homes built in the 1960s and 70s, presents special challenges. Aluminum expands and contracts more than copper, loosening connections and creating fire hazards. Many insurance companies require remediation of aluminum wiring.
GFI (ground fault interrupter) and AFCI (arc fault circuit interrupter) outlets and breakers fail over time, losing their protective function. These should be tested monthly and replaced every 10 to 15 years.
Electrical Repair Costs
Basic electrical repairs are relatively affordable. Replacing a standard outlet or switch costs $75 to $200, including labor and materials. Replacing a light fixture runs $100 to $300, depending on complexity. Installing a ceiling fan costs $150 to $350 if wiring exists, more if new wiring is needed.
More complex repairs get expensive. Replacing a circuit breaker costs $150 to $300. Running new circuits to add outlets or service new appliances costs $300 to $800 per circuit, depending on distance and accessibility.
Electrical panel upgrades represent major expenses. Replacing an outdated panel with a modern 200-amp panel costs $1,500 to $3,500 for standard installations. If the main service line from the utility also needs upgrading, costs increase to $3,000 to $7,000 or more.
Rewiring portions of a home costs $2,000 to $4,000 per room, depending on complexity and finish quality. Complete home rewiring runs $8,000 to $20,000+, depending on home size, number of circuits, and whether walls must be opened and repaired.
Aluminum wiring remediation costs vary by method. Pigtailing all connections with copper wire costs $1,000 to $3,000. Complete rewiring, the permanent solution, costs $8,000 to $20,000+, depending on home size.
Surge protection installation costs $300 to $800 for whole-house protection at the panel. Individual outlet surge protectors cost $20 to $100 each. Given the cost of replacing electronics damaged by surges, surge protection is a worthwhile investment.
Emergency electrical service commands premium rates. After-hours or weekend service costs 50 to 150 percent more than standard rates. But when you’re without power or dealing with sparking, smoking, or burning smells, you have no choice but to call immediately.
Electrical Safety and Prevention
Never ignore electrical problems. Flickering lights, frequent breaker trips, buzzing sounds from outlets or switches, burning smells, or warm outlet covers all indicate problems requiring immediate professional attention.
Test GFI and AFCI protection monthly by pressing the test button—if it doesn’t trip, the device has failed and must be replaced. These protective devices are your first line of defense against electrical shock and fire.
Avoid overloading circuits. If you’re running multiple high-wattage appliances on one circuit and the breaker trips, it’s doing its job. Redistribute your loads or have additional circuits installed rather than replacing breakers with higher ratings.
Have your electrical panel inspected by a licensed electrician every 3 to 5 years, more often for older systems. Early detection of problems like loose connections, corrosion, or failing breakers prevents more serious and expensive issues later.
Don’t attempt electrical work beyond your skill level. While replacing a light fixture or outlet might be manageable for handy homeowners, anything involving the electrical panel or running new circuits should be left to professionals. The risk of fire, shock, or death isn’t worth the saved labor cost.
Foundation Issues: The Cracks That Can Break the Bank
Foundation problems are relatively uncommon compared to other repairs on this list, but when they occur, costs can be astronomical. Foundation issues affect your home’s structural integrity and can make it difficult or impossible to sell until repaired.
Why Foundations Develop Problems
Soil conditions cause most foundation issues. Expansive clay soils swell when wet and shrink when dry, creating tremendous forces that crack and shift foundations. Poorly compacted fill soil beneath foundations settles over time, causing differential settlement where one part of the foundation sinks more than another.
Water management problems exacerbate soil issues. Poor grading that directs water toward the foundation, clogged gutters that dump water near the foundation, or a lack of proper drainage systems all keep soil around foundations saturated. This saturation increases pressure against foundation walls and accelerates soil-related problems.
Tree roots extract moisture from soil, causing shrinkage and settlement, particularly during droughts. Large trees planted too close to foundations create ongoing problems as their root systems grow.
Poor initial construction causes some foundation issues. Inadequate reinforcement, improper concrete mix, insufficient curing time, or building on poorly prepared ground all create weaknesses that manifest as cracks and movement years or decades later.
Plumbing leaks beneath foundations wash away supporting soil, creating voids that cause settlement. Sewer line failures can erode tremendous amounts of soil before being discovered.
Foundation Repair Costs
Minor foundation repairs are relatively affordable. Filling small, stable cracks with epoxy or polyurethane injection costs $300 to $800 per crack. These repairs prevent water intrusion but don’t address underlying structural issues.
Moderate foundation issues require more extensive intervention. Installing drainage systems to manage water around foundations costs $2,000 to $6,000. French drains, proper grading, and downspout extensions all help but aren’t cheap.
Bowing basement walls require reinforcement with carbon fiber straps or steel I-beams. Carbon fiber reinforcement costs $4,000 to $8,000, depending on the wall length and severity. Steel I-beam installation runs $4,000 to $12,000+ for multiple beams.
Major foundation repairs get very expensive. Pier and beam foundation repairs using steel piers or concrete pilings to stabilize and level foundations cost $1,000 to $3,000 per pier, with most homes requiring 8 to 15 piers or more. Total costs typically range from $10,000 to $30,000.
Slabjacking, which involves pumping grout beneath sunken concrete slabs to raise them, costs $1,500 to $5,000 for typical repairs. Mudjacking offers similar results at slightly lower cost, while polyurethane foam injection is more expensive but permanent.
Rebuilding foundation sections damaged by extensive deterioration or settlement can cost $20,000 to $50,000+, depending on the extent. Complete foundation replacement for severely damaged foundations reaches $50,000 to $100,000+—costs that can exceed the value of some homes.
Foundation repair timing is critical. Small problems addressed early cost thousands. The same problems ignored until they’re severe cost tens of thousands. Foundation issues also reduce home values significantly—potential buyers either refuse to buy homes with foundation problems or demand large price reductions to account for repair costs.
Prevention and Early Intervention
Maintain consistent moisture levels around your foundation. Water regularly during dry periods to prevent soil shrinkage. Ensure good drainage so the soil doesn’t become oversaturated during wet periods. This seems counterintuitive—watering around your foundation—but consistent moisture levels prevent the soil movement that damages foundations.
Keep gutters clean and extend downspouts at least 6 feet from the foundation. This simple maintenance prevents tremendous foundation damage by keeping water away from your home.
Monitor your foundation for early warning signs. Small cracks appearing gradually are often normal settlement. But cracks that grow rapidly, horizontal cracks, or cracks wider than 1/4 inch indicate problems requiring professional evaluation.
Doors and windows that suddenly stick or won’t close properly often indicate foundation movement. Floors that develop new slopes or feel bouncy suggest foundation or structural issues. Address these problems immediately rather than waiting for them to worsen.
In another related article, 10 Hidden Signs of Water Damage in Your Home (And What They Really Mean)